
Defenders of Mirror World HQ
Training Missions | Part I | Part II | Part III | Plot Notes
Part II of the plot required participants to rely on the Fortuneteller as their guide. However, for additional information about the plot, one should visit Finneus in the Altadorian Archives. Using goodasnew as a passcode will reveal additional information about the link between the Three and the Golden Orbs.
The same passcode will earn you a new mission from Lightning Lenny.
|
MISSION SIX Gebarn II |
 |
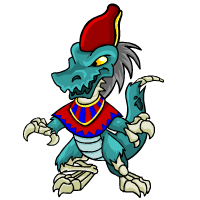
| Description - Undead Krawk - decaying, pale blue skin, tattered clothes, and bones protruding from his skin. Though very old, he has a great deal of magical power, and can summon undead hordes to do his bidding for him. | |
If you go to Sakhmet City, there's a small clickable figure in the bottom right-hand corner of the map. Clicking on it will take you to the Fortune Teller, who also needs to hear goodasnew to know that you've completed Mission Five. She'll tell you more information about the plot.
When you're given Mission Six by Lightning Lenny, you should have noted in the address bar that the mission was listed as oldkrawk. Use that as a passcode at the Fortune Teller's tent to find out about a mummy problem in the Lost Desert.
Go to the three Scroll Shops in Neopia (Qasala, Brightvale, and Sakhmet) and ask for a scroll to receive the ones you need to defeat the first three mummies. Each one you defeat leads you to the next until finally you end up cursed and unable to use scrolls anymore. This means you need a potion now to continue. First go to Brightvale's Royal Potionery and ask for a potion. She'll give you a Potion of Goodness. Next, go to Kayla's Potion Shop and do the same. She'll give you the Potion of Disappearance. Next,go to Kauvara and ask her for a potion, she'll give you a Potion of Destruction.
If you go to Prince Jazan in Qasala and use the Goodness Potion on him, his mummified Anubis will lead you to the Nightsteed. Although technically you can destroy the Nightsteed, you should look for a hidden link on the image just below the moon. It'll lead you to a Mummified Scorchio. Use your Destruction Potion on him and then view the source for the location of the Temple of 1,000 Tombs.
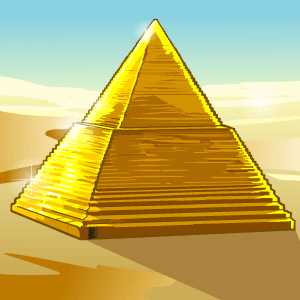
On the Hints page for Mission Six, Lightning Lenny tells you that there's a reason why the undead only come out at night. He mentions bottling sunlight and using it against your enemies. This is where the Island Mystic's clue about asking for that "special something" comes in handy. If you go to the Potion shop in Brightvale and as for a specialpotion, you'll receive a Scroll Potion. Next, click on the sun in the Lost Desert and use the potion to create a Sun Scroll. Go to the Temple of 1,000 Tombs and you'll find Gebarn II. Use the Sun Scroll on him and the Temple of 1,000 Tombs will be unlocked.
Use this passcode to receive the Fire Scarab from Princess Amira back in Sakhmet, as well as the Shadow Scarab from Jazan in Qasala.

MISSION SEVEN
Save the Lost Desert
Now you can go to Sutek's Tomb and use the three Scarabs, in a certain order, to receive Amira's Jeweled Scarab.
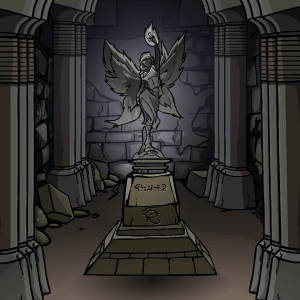
Next, you must find your way to the end of the Temple of 1,000 Tombs. While it is possible to map the temple out and eventually find the end, the real secret lies in Prince Jazan's Shadow Scarab... if you look closely, the image is saved to the site as "241521354531.gif". You can either use the numbers to guide you through the Temple, with each number referring to an open passage in that slot, or you can simply go to Tomb 0531, which is what the last three numbers secretly refer to, but could be mistaken as additional instructions. Once you do, you'll reach the Statue of Nuria. Use the Jeweled Scarab there to send a beam of light into the sky. As far as everyone is concerned, the Lost Desert is now safe.

MISSION EIGHT
RECOVER THE LOST ORB
If you go to the Parrot on the Hill, his clue for this plot is "Wishful thinking, air head!" Also, one of the Island Mystic's clues is "The answer, my friend, is blowing in the wind." The first should lead you to the wishing well. If you wish for an Air Faerie Token, you will receive it. Next, go to the statue of Psellia the Air Faerie in Altador and give her the token. You will receive a new passcode in return.
You should also have taken note of another clue from the Island Mystic: "Oops, missed a spot!" Go to the Janitor and view the source to discover the hidden location of the Scroll Repository. Use the passcode from the end of Mission Seven to get past the guards, then use the passcode from Psellia to blow away all of the sand around the repository. Enter to receive your prize: the Orb of Ambition.
This was the end of the Lost Desert portion of the plot.
Major thanks to jordans_sa for helping us with this portion of the guide!