
Go
To:
Mission One
Mission Two/Three
Part II
After completing Mission One and saving the Snowager, you are told to investigate the earthquakes on Mystery Island.
Mission Two:
Save Mystery Island
Before leaving the Snowager, you are given a secret link to get Inside of the Volcano. Once inside, if you follow the right path, you'll reach the center of the volcano. During the Mystery Island Volcano Plot, this is where you shouted the Mystery Phrase which awakened Moltenus, the giant Moltenore of Mystery Island. Once you shout the Mystery Phrase, however, only a Moltenore appears.
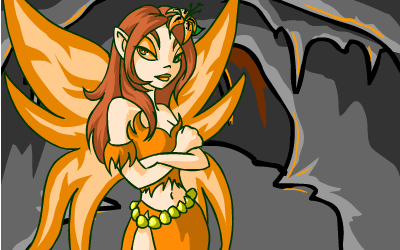
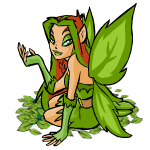
Since this is most likely the cause of the earthquakes and immanent eruption, you decide to visit Jhuidah, the Island Faerie, for advice. She tells you that she thinks either the Evil Shaman or Eithne the Fire Faerie, both from the Volcano Plot, are responsible. Now, there are two secret clues on Mystery Island that will lead you to where you need to go. First, the good old reliable Parrot on the Hill says, "Gotta break the Geb's Code!" This is a reference to the Lost Desert. However, before you go off to do that, you should visit the Island Mystic. His advice: From one fire to another, that is her nature. This tells you that you should look for Eithne the Fire Faerie somewhere similar to where she was last found. Well, there are only two well known Volcanoes on Neopia. One's on Mystery Island, and the other's in Tyrannia.
Proceeding to Tyrannia, there are only two active links. The first is the Volcano, but you'll need a passcode to get any further. The other link is the Tyrannian Town Hall. If you go inside, you'll notice that at the bottom of the page it says, "Maybe one of them has something to say..." If you hold your mouse over Kyruggi the Grand Elder, he says, "The code you seek is 520. That'll make the lava flow!" Return to the volcano and add 520 to the address and you'll find yourself face-to-face with Eithne.
You decide to approach the Fire Faerie...
Hmmm, well, I suppose you're here because
you think that I am responsible for the mess
on Mystery Island... well, you're wrong!
I learned my lesson when Moltenus tried to
eat me. Hmmm, well, I don't want anyone
else to know I'm here, so I'll tell you what...
If I give you the Fire
Faerie Code, will
you leave here and forget all about me?
Okay, deal!
070q
Now you have the code for the Maze of the Fire Faeries! Remembering what the Parrot on the Hill said, you now go to Sutek's Tomb and find a puzzle which needs to be solved.
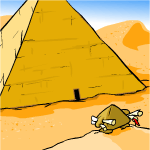
Legend has it that there was an ancient Geb named Sutek. He was stronger, fitter, and cleverer than the other Gebs, and was praised by all for his courage and wisdom. When he died, they built him a tomb that was the same shape as him (known as a Gebmid). It had four triangular sides, and a square base. There are now many Gebmids around the Lost Desert, but Sutek's was the first.
To stop people getting at Sutek's riches (millions of Neopoints), his advisors placed a combination lock on the tomb. Strange symbols adorned an impassable door. For the person who could figure out the pattern to unlock the tomb, well, he would be the wealthiest person alive!
Here is his encrypted code... can you figure it out and gain access to his treasure???
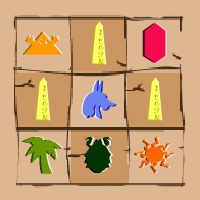
Every symbol in this puzzle represents a location in the Lost Desert. Symbol One is a Geb/Pyramid, Symbol Two is Coltzan's Shrine, Symbol Three is a Ruby, Symbol Four is the head of a Desert Blumaroo, Symbol Five is a Palm Tree, Symbol Six is a Bug, and Symbol Seven is the Sun. All of these locations are hidden on the Lost Desert Map, and once you find each place, you'll also find a playing card. The suit of each card is irrelevant. Also, the Ace you find is actually a 1, not an A. Lastly, in order to find out what the blue symbol in the middle stands for you must recall the password you were given at the end of Mission One, Coltzan. If you go into the Palace and add "coltzan" to the address before ".htm" then you'll arrive here:
The secret password works, and a large, golden door opens...
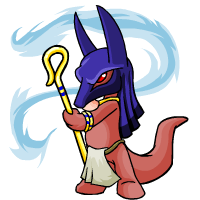
Anubits says 'A is for Anubits..."
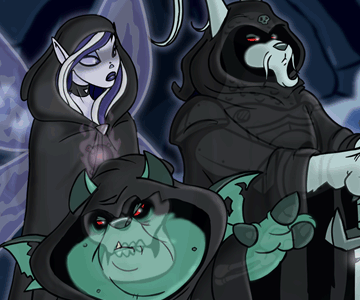
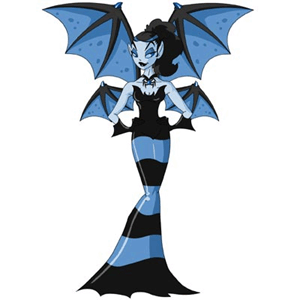
This gives you the final translation. If you've successfully decoded each symbol and put the letter/numbers in the same order as they are found (2757a7419), you'll find a second Dark Faerie hiding inside of Sutek's Tomb. She is responsible for the happenings on Mystery Island, just like her sister was responsible for the spell on the Snowager.
Once this Dark Faerie has been found out, you'll return to the Mystery Island volcano, only to find that it is once again at peace. You'll also get a special hint for Mission Three: "Find a way into the haunted place..."
At last, the Volcano on Mystery Island has stopped erupting! Once again, you've helped save part of Neopia! Now, only the Turmaculus is left under a magical spell... is a Dark Faerie responsible for this? If so, which one? Or perhaps the last two quests were only to throw you off. Either way, there's no better expert on Dark Faeries than Illusen. You'd better see if she can help you on your next quest!
Mission Three:

Save the Turmaculus
Once Mystery Island is safe, you move on to Meridell only to find that Illusen really needs your help!
This is a MAJOR problem!
The Turmaculus is
responsible for half
of the tourism in Meridell!
(I, of course, am responsible for the other half.)
Without the Turmaculus, Meridell will go poor.
You simply MUST help me get him back to normal!
Now, who would have done
such a horrible thing???
Maybe Lord Darigan is preparing for another attack!
Wait, maybe Lord Kass has returned!!!
WAIT! That vile witch Jhudora
*must* be responsible for this!
(I told you not to do her quests!)
Well, whoever is
responsible
*cough* *cough* Jhudora *cough*
you must find out who they are,
where they are hiding, and then
report back to me! Only then
can I reverse the spell on
the Turmaculus and return him
to his bloated, oversized, smelly form...
*sigh*
Why did I build my glade
next to him, anyways?
Oh well, get out there and start searching!
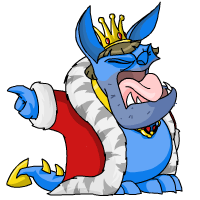
Just like during the last two missions, everyone thinks that the local villain is responsible for whatever bad thing has happened. In fact, if you visit King Skarl, you'll be in for a real treat:
This is, of course, a comical reference to the sudden and unexpected discovery of Brightvale and has nothing to do with the plot. The real clues in this region can be found from Master Vex and Lord Darigan. They both refuse to tell you what room Lord Kass stayed in... but if you go to the good ole reliable Rubbish Dump, then you'll find that he has some input about the situation. He tells you that Kass's Room had to have been the most unlucky room in the citadel. If you go to medieval/room13.htm, you'll find this:
Once that Battle for Meridell was over, this room was sealed off and all of Kass's belongings were forever imprisoned within it, by orders of Lord Darigan. Perhaps there could be something of use in this room after all...
What are you doing here??? Get out!!!
This is merely a red-herring for this part of the plot, but may play a more important role later...
The only remaining "haunted" place in Neopia is the Haunted Woods, and the most famous haunted place in the Haunted Woods is the Haunted House. Initially, there was no link to the Haunted House on the main map, however it was added after once Part II of the plot was released. Inside you will find a Ghost Chia with a special message for you:

*moan*
One word - kefigchetshor.
I don't know what it means,
but it must do something...
Since this is an anagram, you should proceed immediately to Eliv Thade's Castle, since he is the master of anagrams. If you unscramble the phrase given to you by the Ghost Chia, you should get the word: Ghostkerchief. This is the password you need to get into Eliv Thade's Castle and speak with him.
Het rensop uyo esek is
indihg ni het Henadut Croesta.
Oyo eden a sarpwods ot teg ni. Ti si:
192
If you translate what Eliv Thade says, you'll get this: The person you seek is hiding in the Haunted Coaster. You need a password to get in. It is: 912. What many people didn't realize is that even the secret code was scrambled. Moving on to the Haunted Coaster in the Deserted Fairground area, you'll notice that Sidney and the "Test Your Strength" Mynci both warn you about the Haunted Coaster. Hidden on this map is a small link to this secret location. Using the correct code, you'll find this:
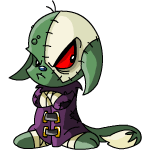
You enter the dark corridors inside of the mountain. You can barely see in front of you, and as you go deeper into the center, you are losing site of the way in. At long last you reach a small abandoned room that's lit by torches. You wonder for a moment how the torches have stayed lit. A shadowy figure then appears from a dark corner of the room.
What are you looking at me like that for?
I didn't do anything! Maybe you should
investigate those evil
Three first...
The final member of the Dark Faerie Sisters points you towards the Three in an attempt to trick you, but it doesn't work. Also, this is a hint that you should go back there later...
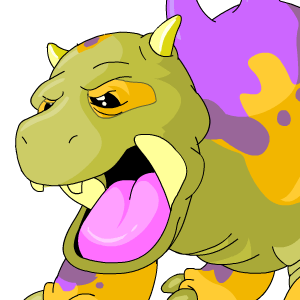
The Turmaculus is back and bigger (and
angrier) than ever!
I don't wanna be around when he spots that dark faerie!
Now that the Turmaculus is back to, errrr... "normal," you'd better go see what Illusen thinks you should do next. After all, all three dark faeries have fallen, right?
So now you go back to see what Illusen has to say, but you find this instead:
You return to Illusen's Glade expecting to see the beautiful Earth Faerie pleased with your progress in stopping the Dark Faerie Sisters... instead, you find that she is trapped inside of a bottle!

HELP!!!
Who is responsible for this??? Balthazar? The Three? The Darkest Faerie... or Jhudora??? I think Jhudora is a safe bet for now, but you may need to investigate the others, as well. So what are you waiting for? Get going!
Before you leave, you grab the Bottled Earth Faerie and bring her with you.
You're next destination is Jhudora's Cloud. You expect to find her waiting for your arrival, but what you find confuses you even further...


Bartamus says 'You're too late! They already got Jhudora!'
Hmmm... well, I guess Jhudora wasn't to blame. But if she didn't do it, then who did???
From the looks of it, the spells on the Snowager, Moltenus, and the Turmaculus were just distractions while the real villain, whoever it was, worked to imprison another of very powerful faeries on Neopia. Now that Jhudora, Illusen, and Fyora are gone, Neopia is vulnerable... soon, you will need to figure out exactly WHO is responsible for this so called "Mirror World" and stop them before they become too powerful...
You decide to pick the Bottled Dark Faerie up and bring her with you...
This is all very interesting, and is also the conclusion to PART I of the Mirror World Mystery!
Go
To:
Mission One
Mission Two/Three
Part II